
Table of Contents
ToggleA cracked or bent dishwasher rack doesn’t have to mean an expensive service call. Whether the coating is peeling, the wheels are damaged, or the rack itself is warped, replacing your dishwasher rack is one of those satisfying DIY fixes that’ll have your machine working like new again. Universal dishwasher rack replacement options are more accessible than ever, and most homeowners can handle this project in under an hour with just basic tools. This guide walks you through why you might need a new rack, what you’ll need to gather, and exactly how to swap out the old one for a fresh dishwasher replacement rack that’ll last years to come.
Key Takeaways
- Dishwasher rack replacement is a cost-effective DIY fix that takes under an hour and prevents rust stains and broken dishes caused by worn or damaged coating.
- Before ordering a replacement dishwasher rack, locate your model number and verify compatibility, as universal options work across multiple brands but fit confirmation is essential.
- Removing the old rack requires patience—take a reference photo of wheel and guide placement, then carefully pry out clips or unscrew fasteners to avoid damaging the tracks.
- Proper installation means securing wheels and guides while the rack is upside down, ensuring they’re straight and level so the rack glides smoothly without binding during operation.
- Test your new rack by sliding it in and out several times before running an empty wash cycle to confirm smooth operation and detect any grinding sounds or misalignment issues.
Why Replace Your Dishwasher Rack?
Dishwasher racks wear down over time, it’s just the nature of the appliance. The vinyl or plastic coating that prevents rust and protects your dishes eventually flakes off, especially at the edges where the rack slides repeatedly against the cabinet. When that coating deteriorates, exposed metal underneath starts to rust, which stains your dishes and spreads debris around the tub. A bent or damaged rack also won’t hold your dishes securely, meaning broken plates or failed wash cycles where water doesn’t reach everything properly.
Replacing the rack is far cheaper than calling a repair technician or replacing the entire dishwasher. Modern replacement racks, including universal options, are built tough and designed to fit a variety of models. The coating on new racks is more durable too, so you’ll get years of reliable service. If your current rack is more than five to seven years old, replacement makes even more financial sense than attempting a repair.
Tools and Materials You’ll Need
Gather these items before you start. You won’t need much, this is a straightforward project.
Materials:
• Replacement dishwasher rack (match your model number or confirm universal fit)
• Wheel and guide kit (usually included with new racks, but verify before purchase)
Tools:
• Flathead screwdriver (for prying out clips and releasing guides)
• Phillips screwdriver (for any fasteners on the rack assembly)
• Needle-nose pliers (helpful for removing stubborn clips or springs)
• Work gloves (optional but useful when handling metal edges)
Before ordering your replacement, locate your dishwasher’s model number, usually a sticker inside the edge of the door or on the side panel. Cross-reference it with the retailer to confirm fit. Some universal dishwasher rack replacement options work across multiple brands, but it’s always worth verifying compatibility. Resources like HomeAdvisor have helpful guides for identifying your specific model and finding the right parts.
How to Remove Your Old Dishwasher Rack
Removing the old rack is the most time-consuming part, mainly because you need to understand how it’s mounted. Take your time here, rushing leads to stripped clips or bent guide rails that’ll complicate installation of your new rack.
Prepare Your Dishwasher
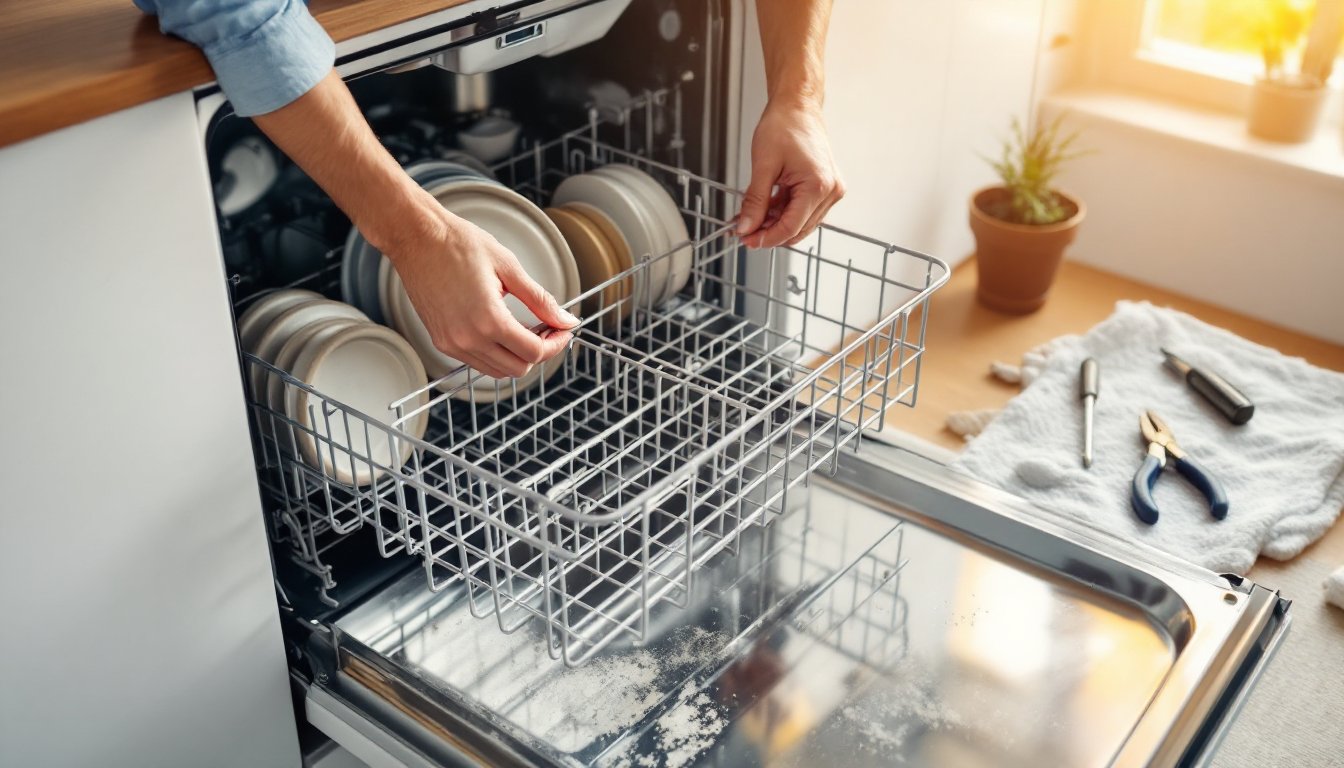
Start by emptying the dishwasher completely and opening the door fully. If your model has a lower rack, remove that first so you have clear access to the upper rack you’re replacing. Pull the upper rack out toward you as far as it’ll slide, it should stop about halfway, held in place by the side guides or bearing blocks. Don’t force it past that point.
Take a photo of how the wheels and guides sit in their slots before you remove anything. This visual reference will save you frustration when reassembling. The wheels are typically rubber or plastic rollers that sit in a curved track along the underside of the tub walls, and the guides are the plastic or metal clips that keep the rack centered as it slides.
Remove the Wheels and Guides
Look underneath the rack where the wheels attach. Most wheels are held in place by a simple clip or a small screw. If there’s a clip, slide a flathead screwdriver underneath it and pry gently, the clip should pop free, and the wheel will drop out. If you’re working with screws, use a Phillips screwdriver to remove them carefully.
Next, locate the guide rails or bearing blocks on the sides of the rack. These are what keep the rack aligned as it slides in and out. They’re usually attached with either clips (similar to the wheels) or small fasteners. Release these using the same method, pry out clips with your screwdriver or remove fasteners. Once the wheels and guides are free, slide the entire rack out of the dishwasher. It should come out easily now. Set the old rack aside and inspect the tracks inside the tub, they should be relatively clean, but wipe away any debris or buildup with a damp cloth. This ensures your new rack will slide smoothly.
Installing Your New Dishwasher Rack
Installation is essentially the reverse of removal, but there are a few critical details to get right. A poorly installed rack will bind during operation or come off the tracks, which defeats the whole purpose.
Attach the Wheels and Guides
Before you slide the new rack into the dishwasher, attach the wheels and guides. Lay the rack upside down on a clean surface to access the underside more easily. Position each wheel in its slot, making sure the roller sits in the curved track correctly. Secure it with the clip or screw provided, clips typically snap down with a satisfying click, while screws should be snug but not overtightened (over-tightening can crack the plastic mounting point).
Attach the guide rails or bearing blocks next, aligning them exactly as they were in the original rack. If you took a photo earlier, reference it now. The guides must be straight and level: if they’re twisted or misaligned, the rack won’t slide smoothly. Double-check that all wheels are spinning freely by rolling them by hand, they should turn without resistance.
Slide the new rack into the dishwasher slowly, watching how the wheels settle into the side tracks. It should glide in with minimal resistance. If you feel binding or grinding, pull it back out and recheck wheel alignment. Once fully inserted, pull the rack out about halfway, it should stop at the same midpoint as the original, held by the guides. Pull it all the way in and out a few times to confirm smooth operation. If the sliding feels rough, you may have a guide slightly misaligned: adjust as needed.
With the rack fully seated, your replacement is complete. Run a test cycle with an empty dishwasher to verify everything works as expected. Listen for any grinding or unusual noises during the cycle. Resources like Good Housekeeping’s dishwasher repair guide offer additional troubleshooting if you encounter issues during operation.