
Table of Contents
ToggleVinyl window replacement ranks among the most impactful upgrades a homeowner can make. Unlike cosmetic refreshes, new windows improve energy efficiency, reduce noise, boost curb appeal, and increase home value, all while staying relatively affordable compared to other major renovations. If your home still has original single-pane or aging vinyl windows, you’re likely losing conditioned air year-round. This guide walks through the why, what, and how of vinyl window replacement, from understanding true costs to knowing when to call a pro versus handling the job yourself.
Key Takeaways
- Vinyl window replacement improves energy efficiency by 40-60% compared to single-pane windows, potentially saving homeowners $100–$300 annually on utility bills.
- Total vinyl window replacement costs typically range from $3,000–$8,000 for a moderate project, including materials ($1,600–$6,000), installation labor ($150–$400 per window), and hidden costs like permits and frame repairs.
- Modern vinyl windows reduce outdoor noise significantly and boost home resale value by signaling a move-in-ready, low-maintenance property to buyers.
- Professional installation is recommended over DIY for full-home replacements due to warranty coverage (5–10 years), speed, and the high cost of fixing mistakes like water intrusion from improper sealing.
- Annual maintenance—cleaning tracks, lubricating sashes with silicone spray, and inspecting caulk lines—extends vinyl window lifespan to 20–30 years or beyond.
- Air leaks, visible cracks, fogging between panes, and high energy bills are clear signs it’s time for vinyl window replacement rather than repair.
Why Homeowners Are Choosing Vinyl Windows
Vinyl has become the standard for window replacement over the past two decades, and for good reason. Unlike wood, vinyl doesn’t rot, warp, or demand constant maintenance, no painting, staining, or sanding needed. It’s also far cheaper upfront than fiberglass or aluminum-clad wood, making it the accessible entry point for most budgets.
Energy efficiency is the heavyweight champion here. Modern vinyl windows use double or triple-pane glass filled with argon or krypton gas, plus low-emissivity (low-E) coatings that reflect heat back into your home in winter and outward in summer. The National Fenestration Rating Council (NFRC) rates windows on U-factor (lower is better for insulation) and Solar Heat Gain Coefficient (SHGC). A quality vinyl window might have a U-factor of 0.28–0.32, compared to 0.50+ for single-pane originals. That difference translates to tangible utility savings, often $100–$300 per year depending on climate and existing condition.
Noise reduction is a bonus many homeowners don’t anticipate. If you live near a highway, airport, or busy street, upgraded glass and improved sealing dampen outside sound significantly. Sound transmission class (STC) ratings measure this: anything above 35 is noticeable.
Finally, vinyl windows boost resale appeal. Buyers see them as move-in ready and appreciate the low-maintenance promise. They’re available in most standard colors and finishes, though custom options add cost.
Understanding Vinyl Window Costs and Budgeting
Budget for vinyl windows hinges on three variables: unit cost, installation labor, and how many windows you’re replacing.
Unit Cost Breakdown
A single vinyl double-hung window (the most common style) ranges from $200 to $500 retail, depending on size, glass options (triple-pane, low-E coating, tempered glass), and frame color. Budget models start around $150–$250: premium models with structural enhancements and extended warranties run $400–$600+. A typical house replaces 8–12 windows, so expect materials alone to fall between $1,600 and $6,000.
According to window replacement cost guides, vinyl windows remain the most popular choice due to affordability compared to wood or fiberglass alternatives. Installation costs usually run $150–$400 per window depending on your region, existing frame condition, and whether the opening needs prep work. Most homeowners spend $3,000–$8,000 total for a moderate replacement project.
Hidden Costs to Plan For
Permits vary by jurisdiction but typically cost $100–$500 for window work. Some municipalities classify window replacement as cosmetic (no permit needed): others require inspection. Check local codes first. If your existing frames are damaged, rotted, or out of square, expect an additional $300–$1,000 for prep and potential framing repairs. Disposal of old windows and frames might run $200–$500 if not included in your installation contract.
Signs Your Windows Need Replacement
Not all window work requires replacement: sometimes resealing, weather stripping, or reglazing solves the problem. But certain signs point to replacement time.
Air leaks and drafts are the top indicator. On a breezy day, hold a lit candle or incense stick near the window frame and watch the smoke. If it wavers or extinguishes, cold air is getting past the seals. Single-pane windows, especially those over 20 years old, almost always fail this test.
Visible damage is straightforward: cracked or cloudy glass, rotting wood frames (especially at sills), or sashes that won’t stay open without a prop. Vinyl doesn’t rot, but aluminum and wood frames do, and repair becomes uneconomical once decay spreads.
Moisture between panes means the seal has failed. You’ll see fogging or condensation that won’t wipe away. This signals the window is past repair.
High energy bills without other explanation often trace back to windows. If you’ve tightened insulation elsewhere and bills haven’t dropped, outdated windows are the culprit. Home service provider reviews often include energy-audit recommendations from local contractors if you want a professional assessment.
Difficulty operating the sashes or frames suggests wear. If they’re painted shut or require force, you might refinish them first. But if the frame is warped or hardware is broken, replacement makes sense.
Preparing Your Home for Vinyl Window Installation
Prep work separates smooth installations from expensive callbacks. Start 1–2 weeks before your scheduled work.
Interior and exterior access must be clear. Contractors need unobstructed paths to each window from inside and out. Remove furniture, pictures, and curtains. On the exterior, trim shrubs, move planters, and ensure yard access. If you have a deck or stairs blocking a window, discuss removal with your installer in advance.
Identify and plan for lead paint. If your home was built before 1978, original windows likely have lead-based paint. Professional contractors are required to follow EPA Lead Renovation, Repair, and Painting (RRP) rules, which include containment and specialized cleanup. Never scrape lead paint yourself, always hire certified professionals. Costs for lead-safe removal run $300–$800 per window in older homes.
Take precise measurements and photos. Note the width and height of each window opening at three points (top, middle, bottom). Measure the jamb depth (the thickness of the wall at the window opening). Photos help manufacturers confirm product specs and prevent ordering errors. Most installers remeasure on-site, but your notes catch mistakes early.
Confirm utility and structural considerations. Newer windows sometimes require deeper jamb extensions if the wall cavity has thick insulation. Discuss any unusual openings, oversized windows, specialty shapes, or windows near structural beams, with the contractor beforehand. This prevents surprises and cost overruns.
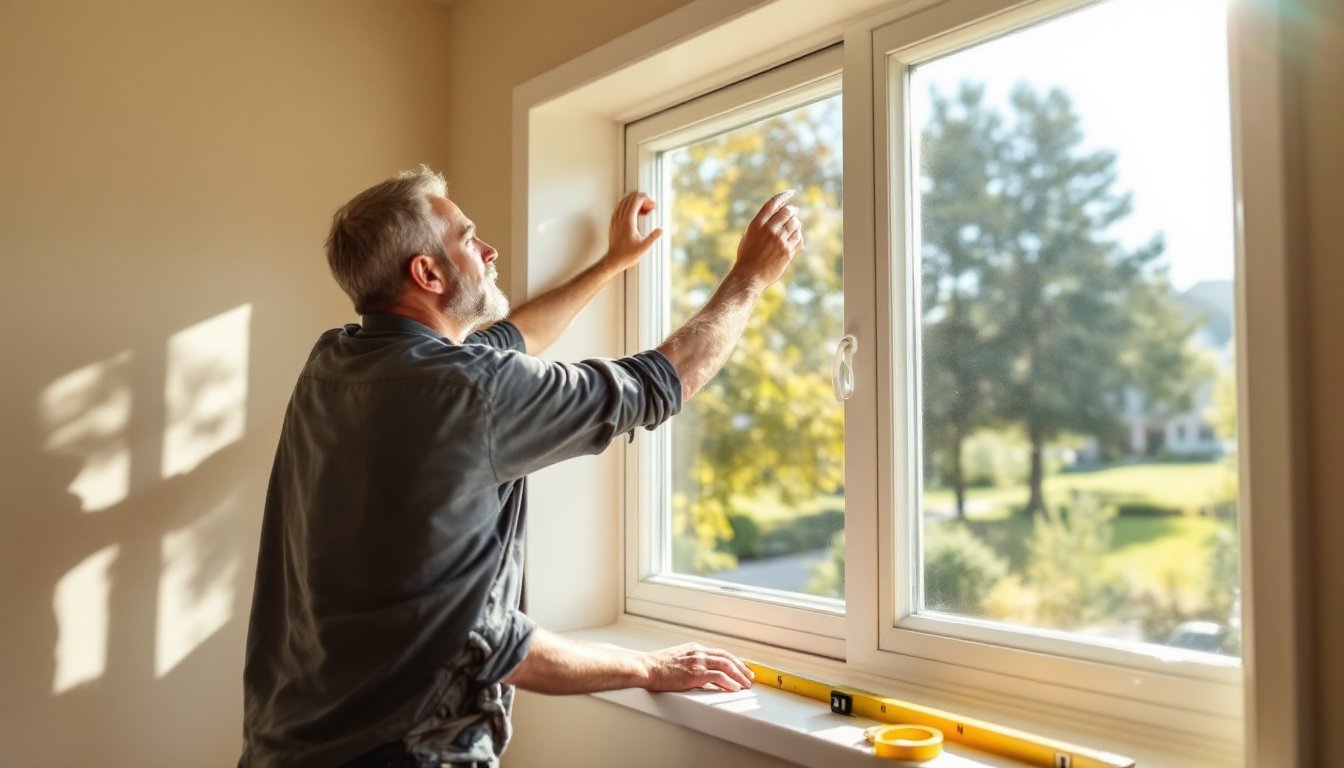
DIY vs. Professional Installation: What You Should Know
Window replacement looks deceptively simple on YouTube. In reality, it demands precision, the right tools, and familiarity with building science. Most homeowners should hire professionals, but understanding the trade-offs helps you decide.
The DIY Route
Replacing a window yourself requires: a reciprocating saw or oscillating multi-tool (to cut old frames), a pry bar, hammer, shims, polyurethane sealant (caulk gun), expanding foam, caulk tools, safety glasses, and a utility knife. You’ll also need measuring tape, level, and square. If you’re comfortable with basic carpentry and have helped a contractor install before, one or two windows is manageable.
But mistakes compound fast. If you don’t seat the nailing fin properly, water enters behind the frame. If you over-tighten the fasteners, the frame warps and the sashes bind. If you seal gaps with caulk alone instead of foam first, drafts persist. Each error costs far more to fix than hiring it right the first time.
The Professional Route
Installers bring speed, warranty coverage, and accountability. A two-person crew typically installs 3–5 windows per day. They’re bonded and insured, so if water intrusion happens within the warranty period (usually 5–10 years), they cover repairs. They also handle permits and inspections in most cases.
Cost is the main downside, labor adds $150–$400 per window, but the time savings and insurance are worth it for most homeowners. For a full-home replacement, professional installation is strongly recommended. For one or two windows and solid carpentry experience, DIY is feasible with honest self-assessment about your skill and patience.
Maintaining Your New Vinyl Windows for Long-Term Performance
Vinyl windows demand minimal upkeep, but neglect accelerates wear. Simple annual maintenance extends their lifespan to 20–30 years or beyond.
Cleaning and Lubrication
Twice yearly, wash the glass, frames, and sills with mild soap and water. Avoid abrasive cleaners or scouring pads, they dull the vinyl finish. For tracks and sashes, wipe out accumulated dust and debris with a dry cloth, then apply a silicone-based lubricant spray (not WD-40, which attracts dirt). Work the sashes up and down a few times to distribute the lubricant evenly. This keeps them sliding smoothly and prevents binding.
Seal Inspection
Once a year, visually inspect the caulk line where the frame meets the wall. If it’s cracking, crumbling, or pulling away, recaulk with 100% polyurethane or acrylic latex caulk designed for exterior use. Don’t use silicone caulk between vinyl and masonry, it doesn’t adhere well and fails quickly. Remove old caulk with a caulk tool or utility knife, apply a clean line, and smooth it with a wet finger.
Hardware Maintenance
Check that locks and hinges operate smoothly. If they’re stiff, apply a small amount of silicone lubricant. Replace any broken hardware promptly, a failed lock invites both security issues and water infiltration over time. Most manufacturers sell replacement hardware kits if your sashes need new balances or operators.
Thermal Movement
Vinyl expands and contracts with temperature. In cold weather, frames shrink slightly: in heat, they swell. This is normal. Never force sashes or frames if they’re tight: wait for temperature stabilization. This natural movement is why proper installation technique, leaving small gaps for expansion and using flexible sealants, matters so much.
Conclusion
Vinyl window replacement is a smart, accessible upgrade that delivers measurable returns in energy savings, comfort, and home value. Understanding your costs upfront, recognizing when replacement beats repair, and weighing DIY against professional installation helps you make a confident choice. Whether you handle it yourself or hire contractors, proper prep and post-installation care ensure your new windows perform for decades.