
Table of Contents
ToggleA 60-inch bathroom vanity is a popular choice for homeowners tackling a bathroom renovation or upgrade. It’s large enough to provide genuine counter space and storage without overwhelming most bathrooms, and it works with both single and double sink configurations. Whether you’re replacing an outdated fixture or building out a new ensuite, understanding what a 60-inch vanity offers, and what it demands in terms of installation and materials, saves time, money, and frustration down the line. This guide covers everything DIYers and homeowners need to know to choose and install the right 60-inch vanity for their space.
Key Takeaways
- A 60-inch bathroom vanity offers the ideal balance of counter space and storage while fitting comfortably in most mid-sized to larger bathrooms without overwhelming the layout.
- Verify that plumbing rough-in is completed before installation, with supply and drain lines roughed to standard heights of 20 inches above the floor, and always test for leaks for at least 10 minutes after connecting fixtures.
- Choose between double-sink and single-sink configurations based on your household’s needs: double sinks work best for shared master baths while single sinks maximize counter space in guest bathrooms.
- Select cabinet and countertop materials that match your maintenance tolerance, with engineered quartz and sealed plywood offering the best durability-to-cost ratio for most homeowners.
- Before ordering a 60-inch vanity, measure your bathroom carefully to ensure at least 18 inches of clear floor space on each side and verify that ceiling height accommodates the vanity and mirror combination without appearing cramped.
- Proper leveling, wall mounting with wood screws into studs, and silicone caulking along the base are critical steps that prevent water damage and ensure your 60-inch vanity remains functional for a decade or more.
What Makes A 60-Inch Vanity The Perfect Fit
A 60-inch vanity sits in the sweet spot for most residential bathrooms. It’s significantly larger than a standard 36-inch vanity, offering real working surface and storage, but still fits comfortably in mid-sized and larger bathrooms without appearing oversized or eating up floor space needed for movement.
Key Dimensions and Space Requirements
When the spec says “60-inch,” that refers to the width of the cabinet itself (often actual width, sometimes nominal, always verify the product listing). Standard vanity depth is typically 20–22 inches, and height ranges from 32–36 inches depending on whether it includes a countertop. Remember: actual dimensions vary slightly between manufacturers.
For installation, you’ll want at least 18 inches of clear floor space on each side of the vanity for comfortable access. If it’s a double-sink vanity, allow an additional 6–8 inches between the sinks for hand clearance. Wall-mounted plumbing (supply lines and drain) should be roughed in before the vanity arrives, most vanities come with pre-drilled holes that need to align with existing or new penetrations behind the wall.
Check your floor plan carefully. A 60-inch vanity leaves minimal room for error in a bathroom under 60 square feet. Measure from the nearest wall or door frame to confirm clearance. Also verify ceiling height: if your ceiling is 96 inches (standard), and your vanity plus mirror is 80+ inches tall, you’re pushing it. In compact baths, consider a mirror slightly shorter than the vanity or skip an overmount mirror altogether.
Popular Styles and Design Options
The 60-inch format spans a wide range of aesthetics. Contemporary vanities feature clean lines, minimal hardware, and often pair with porcelain or concrete countertops and matte black faucets. Transitional designs blend traditional details (like raised-panel cabinet doors) with modern finishes and hardware. Farmhouse and rustic styles typically use distressed wood, open shelving, or shaker-style doors paired with reclaimed metal or iron accents.
Traditional vanities lean into decorative legs, crown molding, and ornate hardware: they often come in warm wood tones (cherry, mahogany, or painted finishes) and pair well with marble, granite, or engineered stone countertops.
When selecting a style, consider your bathroom’s existing tile, paint color, and overall home aesthetic. A vanity is often the visual anchor of a bathroom, so mismatches between cabinet style and wall finishes or flooring can feel jarring. Browse bathroom vanities and sink consoles on Houzz to see how different styles pair with tile, paint, and hardware in real installations. Look for examples that match your bathroom’s square footage and layout, inspiration is useful only if it’s scale-appropriate.
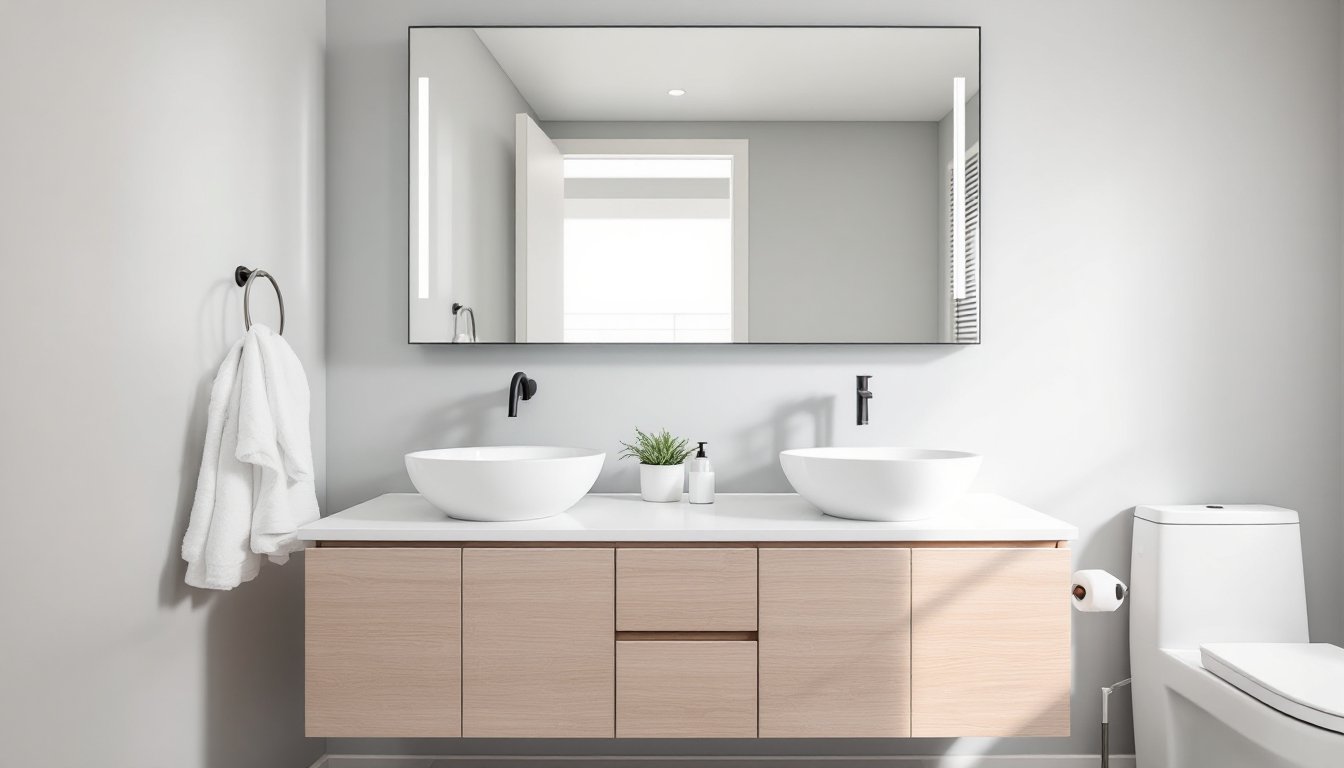
Double Sink vs. Single Sink Configurations
A 60-inch vanity can accommodate either one large sink or two smaller sinks. Double-sink setups make sense for shared bathrooms or master ensuite bathrooms where two people might get ready simultaneously. Each sink typically measures 18–24 inches wide, leaving 6–12 inches of counter between them for small items.
Single-sink vanities at 60 inches offer significantly more counter space, useful if you prefer room for cosmetics, soap dispensers, or guest items without clutter. A single sink also simplifies plumbing (fewer supply and drain lines to coordinate) and may lower costs.
Consider traffic patterns in your home. In a guest bathroom, a single sink vanity with generous counter reduces congestion. In a master bath shared by two people, double sinks prevent the “toothbrush standoff” each morning. Also think about future resale: master baths with double sinks are standard expectations for modern buyers, while guest baths with one large sink are equally desirable.
Sink depth matters too. Undermount and vessel sinks sit differently than drop-in sinks and affect both functionality and cleaning ease. Undermount sinks (mounted from below) pair well with laminate, wood, or composite countertops and are easy to wipe down. Vessel sinks sit atop the counter and look sculptural but require more faucet height to clear the rim. Drop-in sinks are traditional and forgiving if your counter surface is slightly uneven.
Material Choices and Durability Considerations
Vanity cabinets are typically built from plywood, MDF (medium-density fiberboard), solid wood, or a combination. Plywood is durable and moisture-resistant, especially in higher-quality vanities with sealed edges. MDF is cheaper but less water-resistant: avoid it in high-moisture areas or without robust finishing and sealing. Solid wood (maple, oak, cherry) offers longevity and can be refinished, but costs more and requires regular maintenance to prevent water damage.
Countertop materials vary widely. Laminate is budget-friendly and water-resistant when sealed properly at seams, but it’s not repairable if gouged. Solid surface materials (Corian, Quartz) are non-porous, durable, and look upscale: they resist stains and are easy to clean but can be expensive. Granite and marble are beautiful and heat-resistant but porous and require sealing to prevent water and stain absorption. Engineered quartz combines durability and low maintenance, it’s harder than granite, doesn’t require sealing, and comes in hundreds of finishes.
For a vanity that you want to last, choose cabinet-grade plywood with moisture-sealed edges and a quality countertop material matched to your maintenance tolerance. If you’re on a budget, a solid plywood cabinet with engineered quartz countertop offers great durability-to-cost ratio. If you prefer natural stone, budget for annual sealing and understand that marble requires extra care in active bathrooms.
Installation Tips for DIY Enthusiasts
Installing a 60-inch vanity is well within reach for a confident DIYer, but it requires planning and a second pair of hands.
Before delivery: Confirm that plumbing rough-in (supply and drain lines) is already roughed into the wall. Measure the distance from the floor to the center of supply and drain lines: standard heights are 20 inches above the floor. If roughing isn’t done, hire a plumber, this is structural and often requires permits and inspections.
Tools you’ll need: A level (24-inch minimum), a drill-driver, shims, a wrench set, adjustable pliers, caulk gun, and Teflon tape for water supply connections. A miter saw or table saw is helpful if you need to trim the vanity to fit an awkward wall, though most vanities arrive ready to install. Safety gear includes work gloves (for handling heavy vanities) and eye protection (debris from silicone caulk and drill bits).
Installation steps: Unbox the vanity and let it acclimate to your bathroom’s humidity for 24 hours if it’s a wood unit, this prevents swelling or warping later. Position the vanity against the wall and use shims underneath and behind it to level and plumb it: check with your level on the top surface and against the cabinet sides. Once level, mark mounting holes on the wall (usually two to four per vanity), drill pilot holes, and secure with 2.5-inch wood screws into the wall studs.
Connect supply lines using compression fittings and Teflon tape on threaded connections: hand-tighten, then use an adjustable wrench for a final quarter-turn. Don’t over-tighten, you risk damaging the fitting. Connect the drain assembly (P-trap and tailpiece) using slip nuts: again, hand-tighten first. Apply silicone caulk (not grout) along the base where the vanity meets the wall to prevent water seeping behind the cabinet. Caulk between the vanity and countertop if there’s a seam.
Always test for leaks before fully closing up walls or painting. Turn on the sink and watch underneath for drips for at least 10 minutes: tighten any connection that weeps. Minor drips often indicate a need to re-seat the fitting or add more Teflon tape. If the leak continues after re-tightening, the fitting may be damaged, replace it.
Note: Gas connections are not a DIY job, hire a licensed plumber. If your vanity includes a heated towel rack or other electrical feature, verify that a GFCI outlet (ground-fault circuit interrupter) is installed within 6 feet of the vanity and is on a dedicated circuit. Bathroom code in most jurisdictions requires this: Remodelista’s design guides often reference building code compliance in bathroom remodels.
Conclusion
A 60-inch bathroom vanity is a smart investment for most mid-sized and larger bathrooms. The key is matching the vanity’s dimensions to your space, choosing materials that suit your maintenance style, and installing it correctly the first time. Take time during the measurement and planning phase, this is where most DIY frustration happens. Get a second pair of hands for assembly and final positioning, don’t skip plumbing rough-in or water-supply testing, and use interior design inspiration from Homify to see how finishes and styles work in real bathrooms before you buy. A well-chosen and properly installed vanity will serve your bathroom reliably for a decade or more.